Debian Linux on the D-Link DNS-320 & DNS-325 NAS
They're both 2-bay NASes based on the Marvell Kirkwood SoC, like the sheevaplug. They come with their own flavour of Linux, but this can be thrown away and use standard Debian instead.
- U-boot output: DNS-320 DNS-325
- Dmesg output: DNS-320 DNS-325
- DNS-325 lsusb -v output
- kernel .config
↑What's new?
- 2023-07-30
- Use
cmdlinepart.mtdpartsin the u-boot bootcmd, increase uInitrd load address (thanks Alexander Tomisch). - 2014-03-15
- Set a load address for the initrd image (thanks Jisakiel).
- 2013-11-17
- D-link u-boot requires specific addresses to load the initrd (thanks Niclas Borlin).
- 2013-11-04
- The Keep the original firmware page had some mistakes, hopefully now fixed.
- 2013-09-06
- Added DNS-320L links
- 2013-09-02
- Change the Keep the original firmware page to use Debian kernels instead of rolling our own.
- 2013-08-11
- Add notes to userland configuration on enabling power recovery---the in-kernel version has been broken for some time.
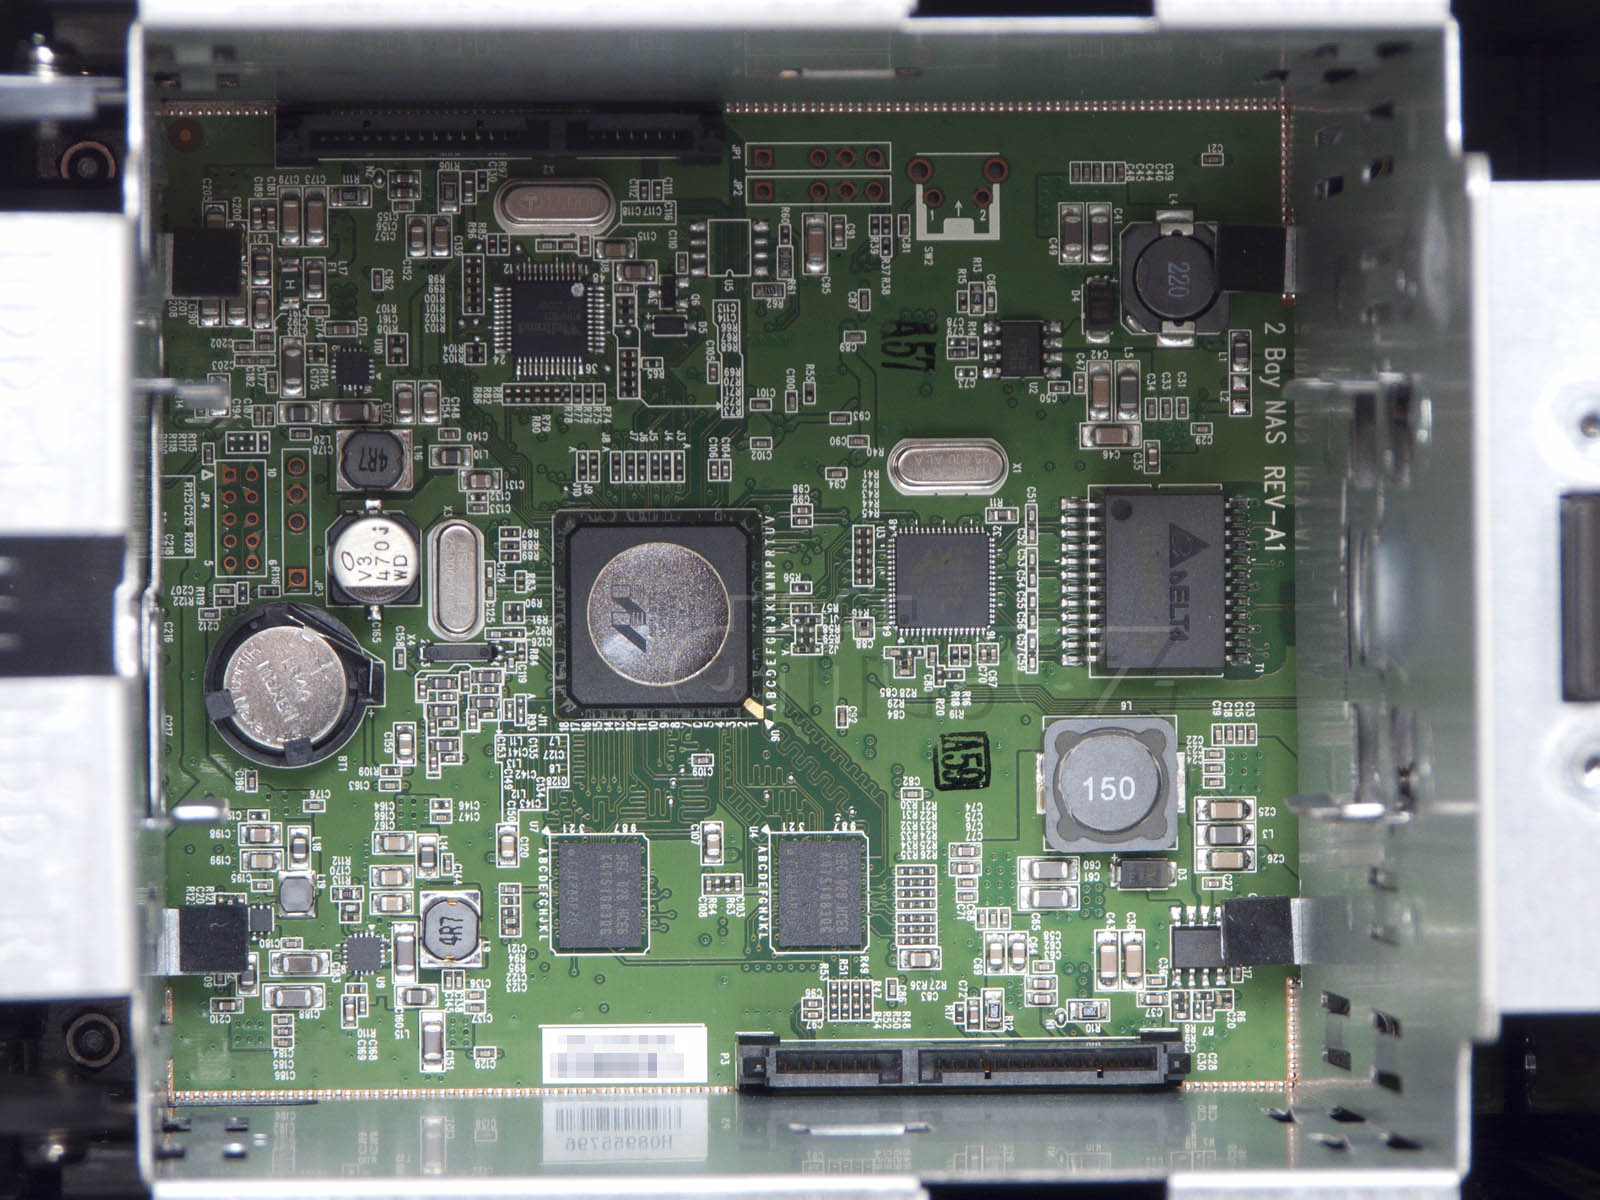
↑Hardware
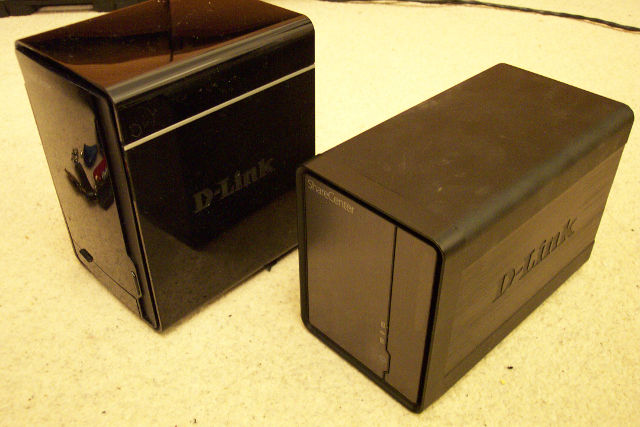
The main difference between the two is the case. The DNS-325 is a reasonably swish-looking metal case with drives slid in from the front. The DNS-320 has a much cheaper case with drives that go in the top like a toaster.
The innards are approximately the same. The DNS-320 has half the RAM and is underclocked at 800Mhz, which I'm not sure is supposed to be possible. It could be that it was supposed to have a 88F6192, but something happened late in development. Maybe other DNS-320 revisions do.
| DNS-320 | DNS-325 | |
| SoC | Marvell 88F6281-A1 @800Mhz | Marvell 88F6281-A1 @1200Mhz |
| RAM | 2xSEC K4T51083QG-HCE6:64Mx8 @333 CL5 (128MB total) | 2xSEC K4T1G084QF-HCF7:128Mx8 @400 CL6 (256MB total) |
| Flash | SAMSUNG 146 K9F1G08U0D SCB0 (128MB total) | SAMSUNG 946 K9F1G08U0B PCB0 (128MB total) |
| PHY | Marvell 88E1116R-NNC1 | |
| Fan | ADDA AD045HB-G73 (Same as DNS-323) | |
| Temp | Internal to Weltrend chip? | G751-2f (Same as DNS-323) |
| PMU(?) | Weltrend WT69P803 | Holtek HT48C06E |
| Appear to be microcontrollers that control power on/off and other miscallaneous functions, but hard to tell for sure. | ||
DNS-320L
The DNS-320L is the replacement to the DNS-320, and largely similar hardware. The main difference being that the Weltrend chip controls much more than it previously did. I do not have one, but other people have worked on it. Have a look at:
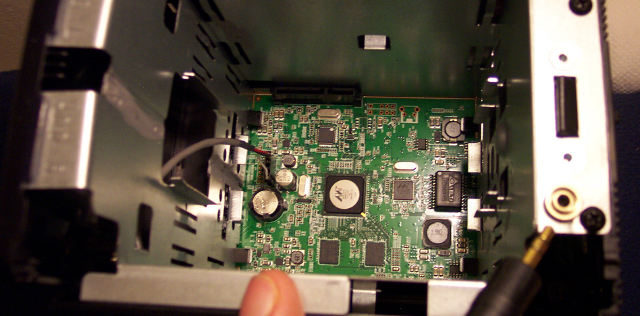
Chassis & dissassembly
Dissassembling a DNS-325 is very easy, and no "warranty void" stickers in the way.
- At the back of the unit, remove 4 circular rubber pads and screws underneath, remove plastic back
- Remove 4 small silver screws from metal plate underneath the plastic back
- Slide entire circuit board out
The DNS-320 is slightly more involved, but still has no stickers in the way.
- Take off lid
- Undo 2 screws around catch
- Remove 4 rubber feet and screws underneath
- Pull innards out
- Undo 4 screws either side of front panel and remove it
- Undo 4 nuts holding chassis onto mainboard
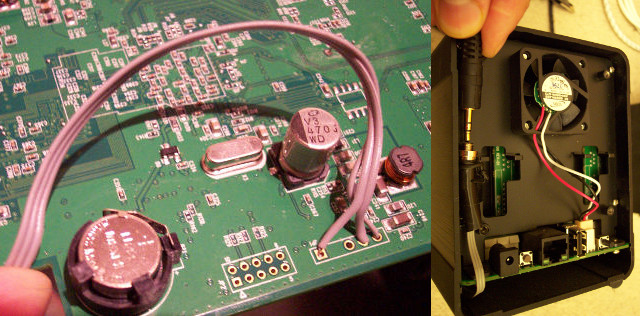
Serial Port
There is an unpopulated space for a serial port standard 0.1" pitch header. The serial port runs at 3.3v TTL so requires either a MAX3232 adapter or a USB serial adaptor designed to run at 3.3v. A TTL-232R-3V3-AJ cable is reasonably cheap, and a headphone jack for serial can be added in a reasonably neat fashion.
The pinout is as follows:-
| JP1/JP3 | 1 | x | 3 | 4 | 5 |
| Function | RXD | (gap) | 3.3v | Ground | TXD |
| TTL-232R-3V3-AJ | Tip | Sleeve | Ring |
NB: Tip/Ring may be reversed, this was from memory
- DNS-320 (JP3)
- The header is the center of board so a header can be soldered on the top
side without getting in the way of the HDDs. Using an old CD-audio cable
I fashioned a header to stereo headphone jack cable. The headphone jack is
mounted by drilling a hole next to the lid catch.
- DNS-325 (JP1)
- There is no space for a proper header connector whilst the case is
closed. I soldered wire directly to the motherboard, and put a stereo
jack on the other end, looped through and taped to the back of the case.
To communicate to the NAS, open the serial port at 115200 baud, 8-n-1, flow
control off. You should be able to see it boot, however D-link put in some
petty measures to stop you tinkering. If you want to stop u-boot booting,
then press space then 1 when prompted to press any key. To get a
prompt once the original firmware is booted, type the break-in code 5784468.
JTAG
The JTAG port is a 2x5 pin header, the same as a DNS-323. It is described here.
Stefan Herbrechtsmeier says "The image and table have different signal names for pin 2 and 9. I made the mistake using the image and not the table when I solder the adapter for my JTAG debugger. Because of this I can not reset the processor correct and have some trouble to reflash the memory."
On the DNS-320 it's JP4, on the DNS-325 it's JP2. Both are next to the serial console header.
Other connectors
- DNS-320
- There is space for 2 extra headers resembling serial ports, JP1 (3.3v) and JP2 (5v) and a button (SW1). These are connected to the Welltrend processor and probably not much use. There is a GPIO pin available on the space for U5, possibly where the G751-2f would have gone?
- DNS-325
- There is a space labelled U11 on the underside, which appears to expose I2C.
↑Installing Mainline Linux
There's various ways to go about installing linux, depending on how fond you are of the original firmware.
All of thse require access to the serial port, as explained above. It may be possible to build a firmware image without, however the risk of bricking the NAS is much higher. I don't dare tell you how to do that.
Choose your adventure!
Once you have Debian running on your NAS, you will want to look at the Userland configuration page.
↑Link-o-rama
- DNS-325 on hackriculture.fr
- DNS-320 on dns323 wiki
- DNS-325 on dns323 wiki
- A DNS-325 guide using Emdebian instead of regular Debian
- A different DNS-320 & debian page with lots of detail
- Images from DNS-325 review
- DNS-320 review with lots of lovely pictures
- Boot kirkwood SoC's via the UART
- http://www.support.emtrion.de/doku.php?id=linux:linux_gpio-emdist-23
- http://support.dlink.com/emulators/dns325/101/login.html